

Garlic bread is the universal love language of carbs, and Trader Joe’s just slid into our pantry DMs with their new shelf-stable organic take and bake version. That’s right, folks, this is garlic bread that you don’t even have to refrigerate. It’s like the apocalypse-proof bread of your dreams, ready to be tossed in the oven or grilled to golden perfection whenever your pasta or soup is feeling lonely. But is it a savory delight or just glorified garlic toast from the garlic twilight zone? Let’s find out.
I love garlic bread! I know most of America loves garlic bread. I love the garlic bread I grew up with which was that semisoft, “Italian” loaf of bread cut lengthwise and slathered in butter that was melted with a ton of garlic in it. Then pop in the oven and toast the loaf until browned and cut up and enjoy with a big bowl of spaghetti! My mother made it all the time for us kids. It was a cheap way to fill us up. Just like Olive Garden! Yum!
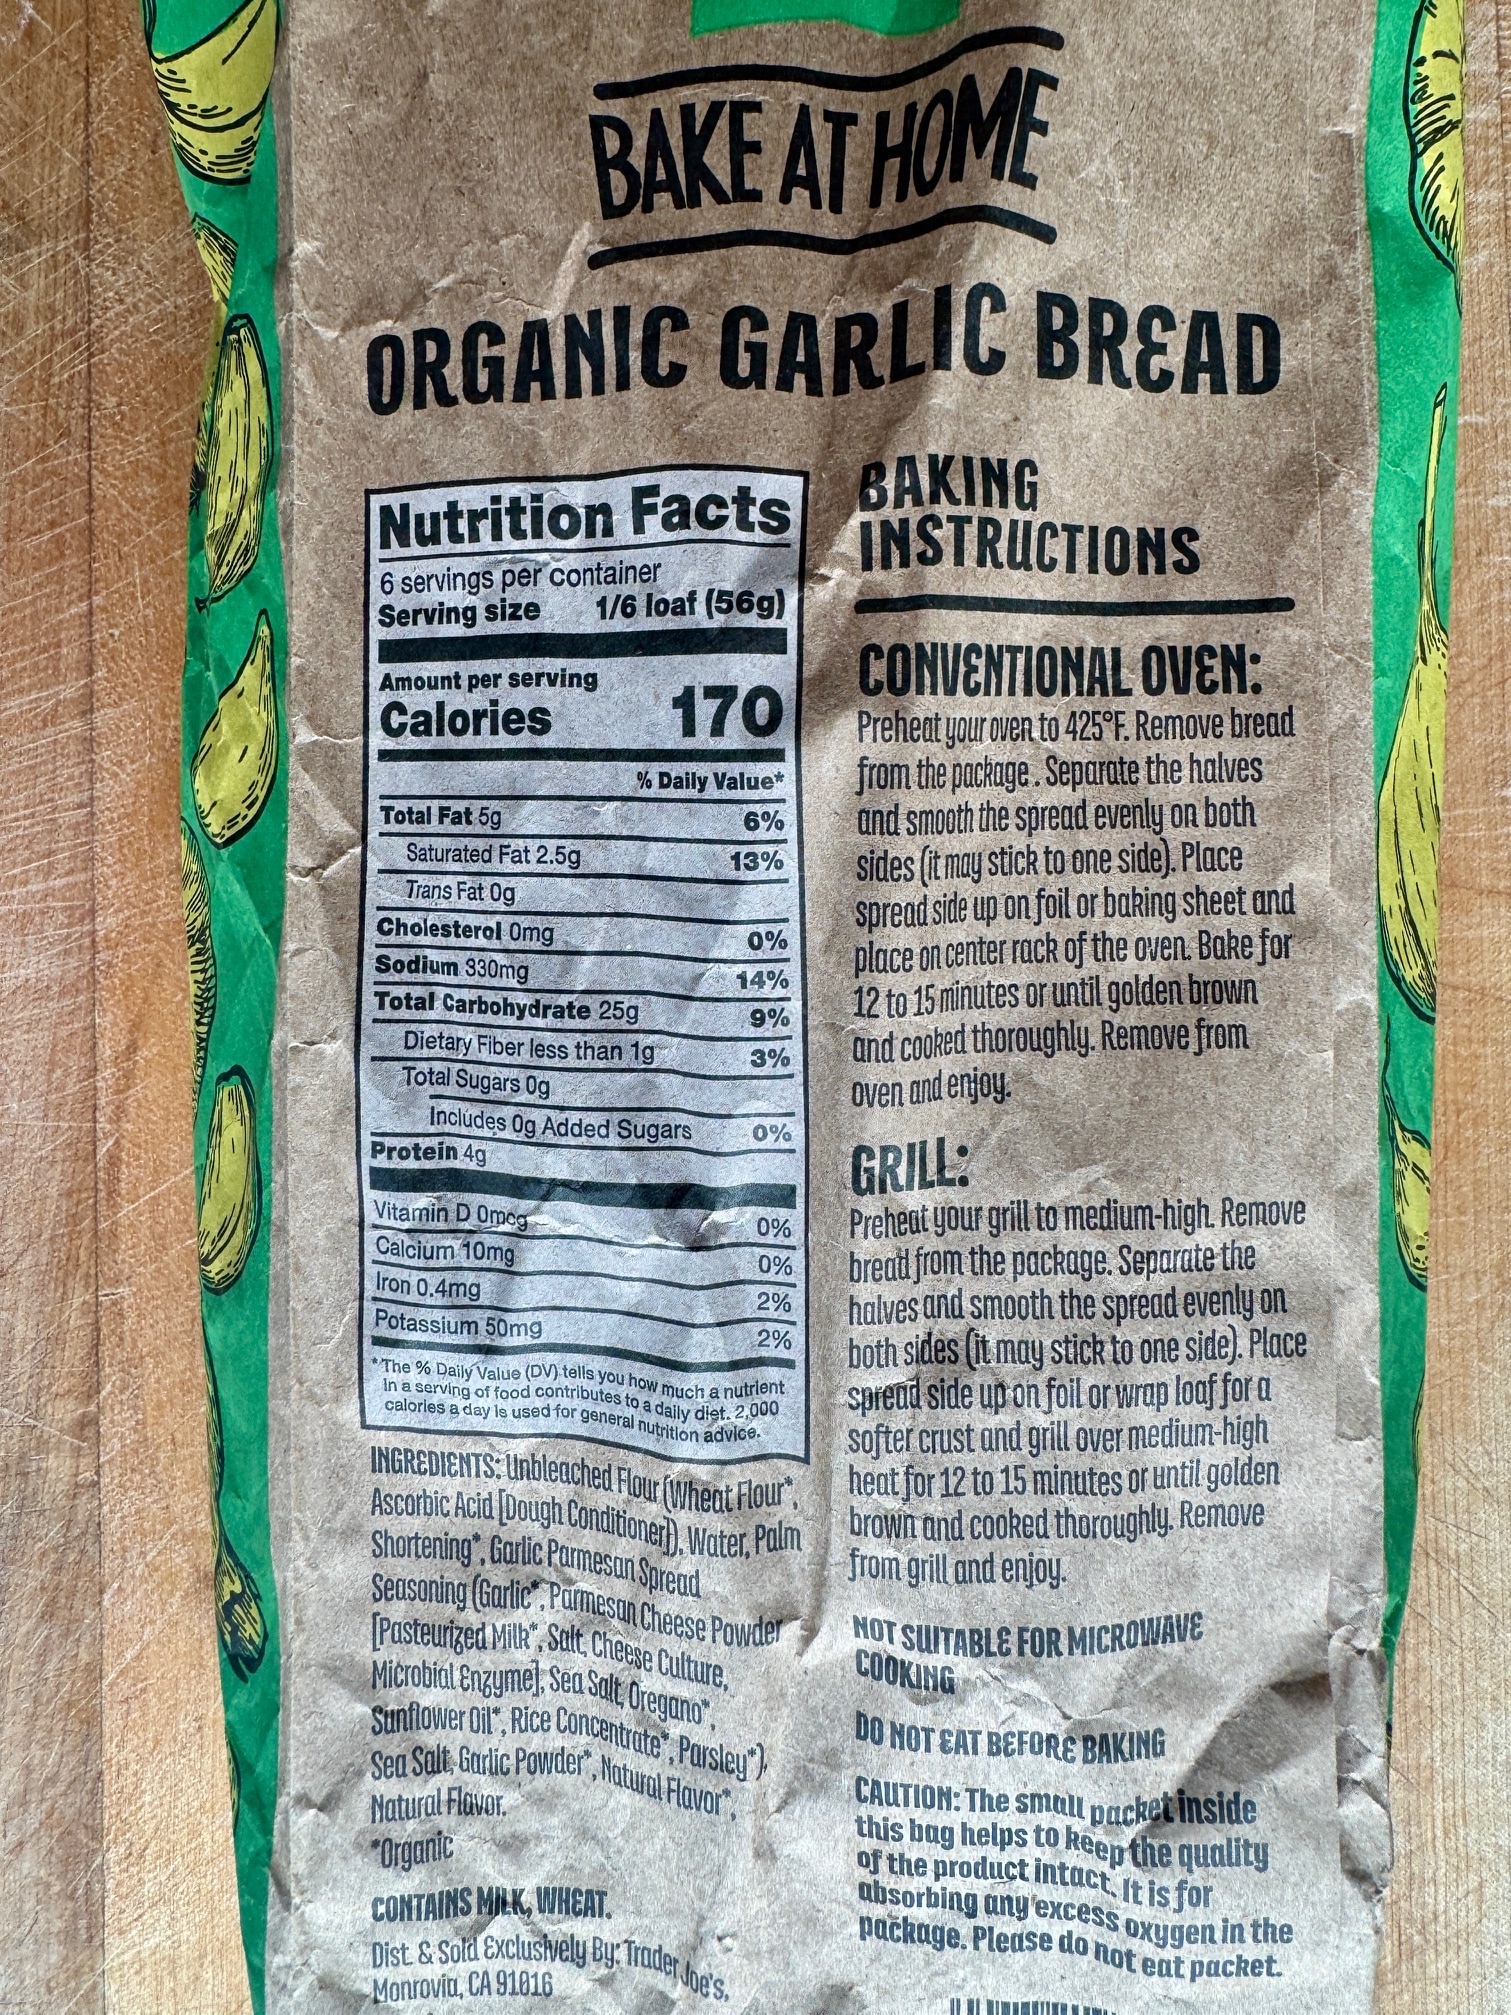
I had seen some buzz on the social media forums about this garlic bread from Trader Joe’s that is in the bread section right now. It’s basically a heat and serve garlic bread saving you about five minutes of work. If you are too busy (and I know there are a lot of busy moms out there so I get it) to melt some butter and throw a couple of cubes of frozen crushed garlic in a pot, then this might be for you.

The interesting thing about this loaf is that it seems to be shelf stable for a few months. Like you can literally throw it in the pantry and forget about it for several weeks and it will still be good. The loaf comes vacuum sealed and was good for about four months. Through the clear plastic bag (do not put the blue packet or the whole clear plastic bag in the oven!) the loaf actually looks pretty good.
So, I warmed up the oven to the specified temperature, in this case 425f, and then opened the bag. The instructions say to make sure you spread the butter/cheese mix more evenly on the surface of the loaf and I had to do that since a lot of it stuck more to one side.

At this point, I just put it into the prewarmed oven and let it bake for 12 minutes and mine was nicely browned. It smelled good and looked great. But how did Trader Joe’s Organic Garlic Bread taste?
Well, not so good. The best part of this was the bread. I thought the bread was decent. Nicely crispy outside and soft just like want a loaf of garlic bread. But the topping. It was meh. It tasted stale and did not have much garlic flavor. I want my garlic bread to be garlicy and this was not. It had hints of garlic. The cheese also fell flat. There simply wasn’t enough of the butter/cheese mix to penetrate the bread. The combination just lacks depth of flavor. You might be better just buying the garlic bread at Safeway. For $3.99 you can make some for almost the same amount of money at home. It all just fell flat. For those reasons, I am going to rate it a lowly 5 out of 10 stars.

In my humble opinion you can make much better garlic bread by spending a few extra minutes to make it yourself. I feel so strongly about this, I posted a recipe below for you to use.
Classic Garlic Bread Recipe
Ingredients:
- 1 loaf of Trader Joe’s French or Italian bread (or baguette)
- 1/2 cup (1 stick) unsalted Trader Joe’s Organic butter, softened
- 3–4 garlic cubes of frozen crushed garlic
- 2 tablespoons fresh parsley, finely chopped (optional)
- 1/4 teaspoon salt (if using salted butter, reduce or omit)
- 1/4 teaspoon black pepper (optional)
- 1/4 cup grated Parmesan cheese (optional)
- Pinch of red pepper flakes (optional, for a little heat)
Instructions:
- Preheat Oven:
- Set your oven to 375°F (190°C).
- Prepare the Garlic Butter:
- In a bowl, mix the softened butter, minced garlic, parsley, salt, and pepper until well combined.
- If you’re adding Parmesan or red pepper flakes, mix them in now.
- Slice the Bread:
- Cut the bread into thick slices (about 1 inch), leaving the slices attached at the bottom if you want a pull-apart effect. For individual slices, cut all the way through.
- Spread the Butter:
- Generously spread the garlic butter mixture on one side of each slice, ensuring even coverage.
- Wrap and Bake:
- Wrap the bread loaf in aluminum foil (if it’s still whole) or arrange individual slices on a baking sheet lined with foil.
- Bake for 10–15 minutes until the butter has melted and the bread is warmed through.
- Optional Crisping:
- For a crispy edge, unwrap the foil or broil the bread on high for 1–2 minutes. Watch closely to avoid burning!
- Serve and Enjoy:
- Serve hot as a side to pasta, soup, or salad. Or just eat it on its own—no judgment here!
Pro Tip:
For a cheesy twist, sprinkle shredded mozzarella on top of the bread after baking and broil for an extra minute until bubbly.
Enjoy your homemade garlic bread!
Trader Joe's Organic Garlic Bread

Trader Joe’s failed attempt to bring us a decent loaf of heat and serve garlic bread. The seasonings had a stale unpleasant flavor and I was left wondering where the garlic flavor was.
Pros
Good price
Shelf stable
Decent price
Cons
Unpleasant stale flavors
Uneven flavorings
Lack of garlic flavor
Leave feedback about this